Guide to set up the album
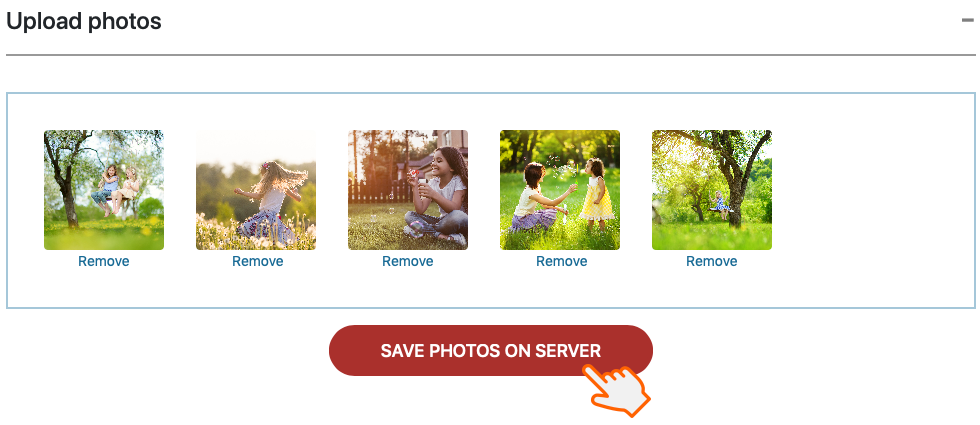
Click on “Add New Album” and it will take you to the entire set-up of the album. First, fill in the data about the album including the optional deadline after which the album will automatically be closed and clients will no longer be able to select photos. By clicking the button “Create Album” the album is created, its status is shown as Draft and you can move on to the uploading photos. You can either drag and drop the file or click to upload the photos. As soon as the process of uploading is successful, click on “Save Photos” on server.
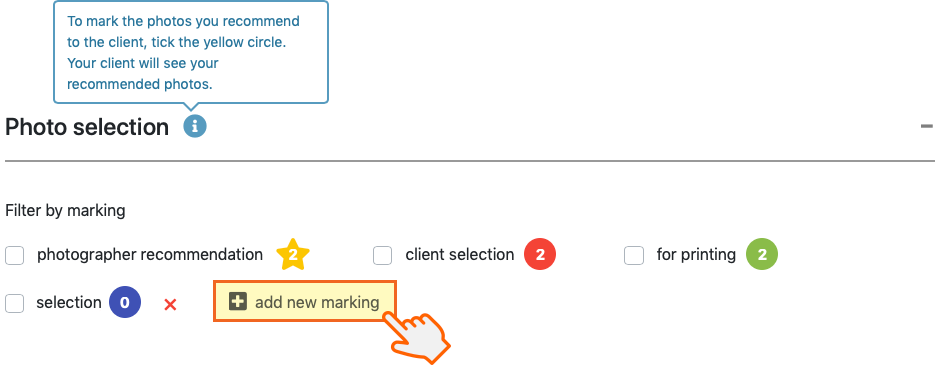
At that moment, you get to the Photo selection card where you can see the uploaded photos and you can work with them. By choosing the yellow button you will recommend to your clients the best photos. Later you will see the photos selected by clients indicated by the red button. Clicking on the button “add new folder” you will get a new folder and you can change its name just by clicking on it. Add a folder with black and white photos or one dedicated to other purposes and make your communication with clients easier. The maximum number of folders you can add is 3.
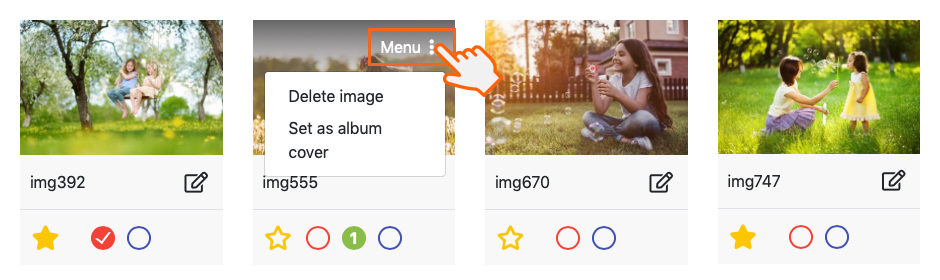
You can delete the folder by clicking the small red cross behind the name of the folder. You can add a comment to any photo thanks to the pencil icon under the photo. If you hover the mouse over the top right corner of the photo, you will see the “Menu” button. When you click on the Menu button you will reveal two options: “Delete image” or “Set as album cover”.
In the next part, select the print sizes that will be available to the client. If you want to add a print size that is not visible in this place, do so in Account settings under My account in the top right corner of the screen.
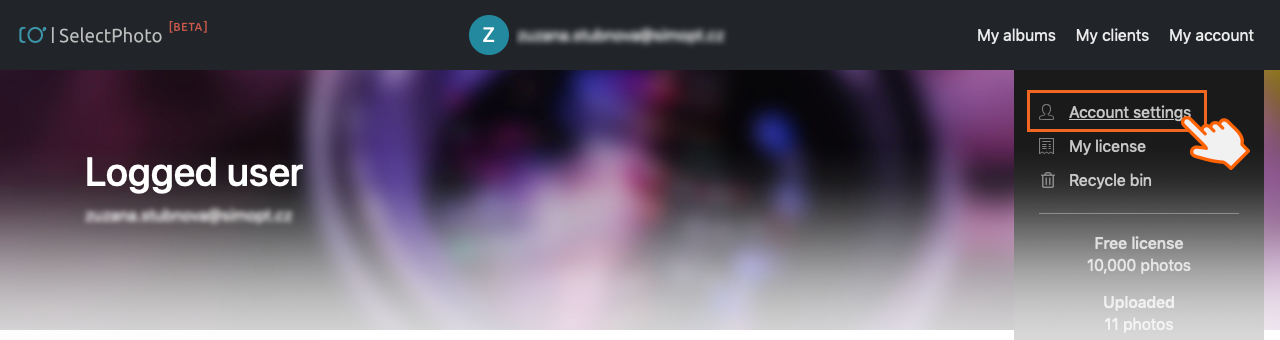
Tags can be created in Account settings and assigned to the album for easier orientation among the albums. Later on your home page, you can simply filter the albums according to their tags.
Now it is time to add clients to the album. You can only add one or if you take photos of mass events, you can add multiple clients to the same album, giving each client the ability to create their own selection depending on the chosen permission. Those with the permission marked with a crown have the option to add other clients, comment on photos, make photo selections and add, change, or delete folders in the album. Clients with the permission marked with a mouse pointer can also select and add tags to the photos but without the ability to edit folders and add more people to the album.
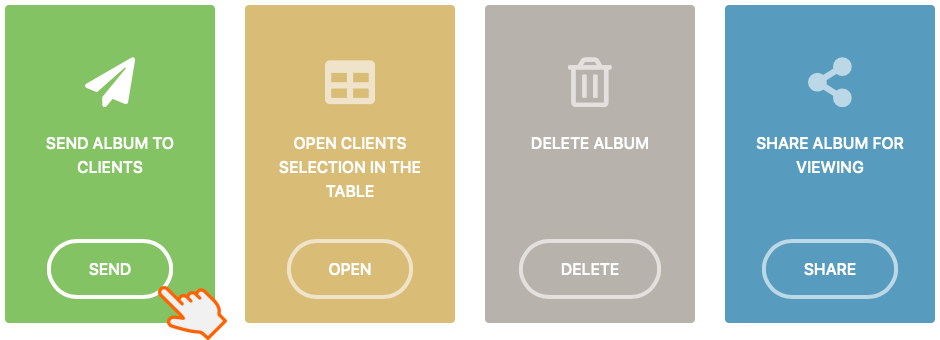
If you have selected photos to recommend to clients, you can send the album to the clients by clicking on the given icon.
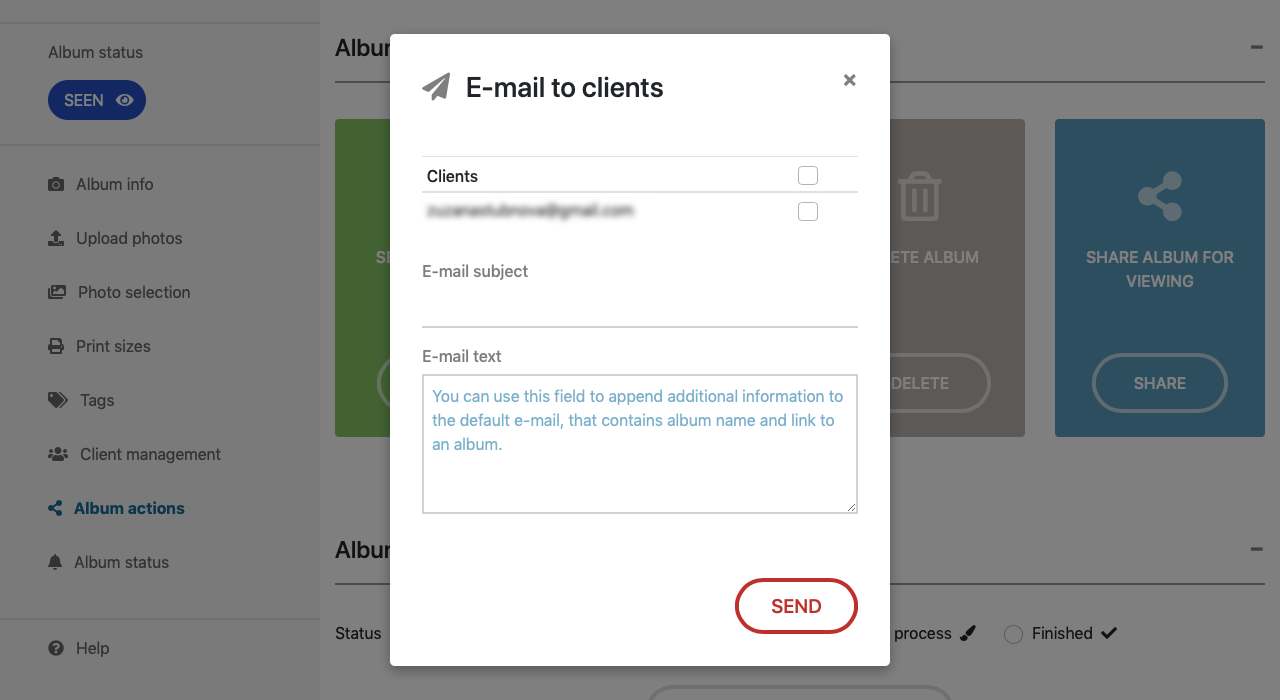
Then a box for sending an email to the clients is displayed. Select recipients, fill in the subject line and the text of the email and send it. Each client will receive the email with their unique album link.
At this point, the album status changes to “Sent” and the clients receive an email from which they can get to the photo selection. This will change the album status to “Seen” for you. When all of the clients select the photos and confirm their selections or when the album is automatically closed on a date chosen by you, the album status changes to “To process”. For you it is a signal that you can open the client’s selection in the table.
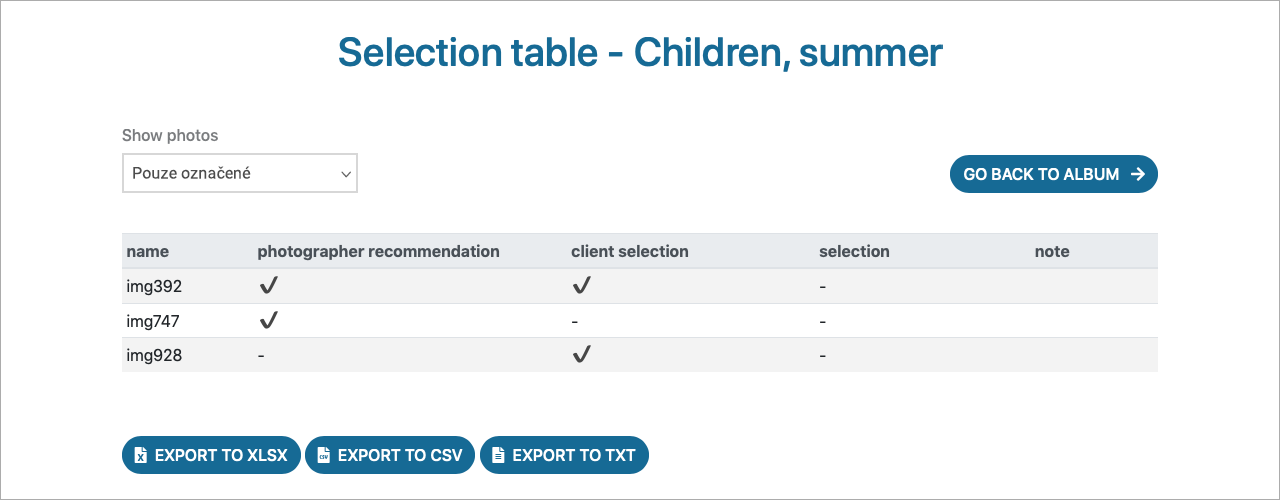
Subsequently, the overview of the selection from the given album is displayed and you can export it to three different formats.
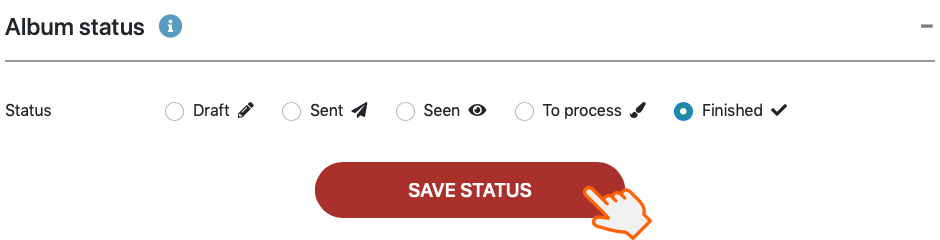
When your work on the album is complete, you can set the album status at the bottom of the SelectPhoto page as “Finished” and save it. If you no longer need the album, you can simply delete it by clicking on the Delete album icon.